doobraap Posted August 31, 2007 Report Share Posted August 31, 2007 I use an HJC CL14. It's comfortable and reasonably light but the wind noise is awful. anyone have a helmet they really love? I also prefer to use a heated shield instead of a mouthpiece like the BVS helmets.... Quote Link to comment Share on other sites More sharing options...
rob Posted August 31, 2007 Report Share Posted August 31, 2007 I've been using a Cat TXi helmet the last few years, but will be trying out a BV2s this winter. Quote Link to comment Share on other sites More sharing options...
smclelan Posted August 31, 2007 Report Share Posted August 31, 2007 I wear an Arctic Cat black and chrome TXI with a heated shield. A very nice helmet in my opinion. It is warm and I have never had fogging or frost issues. Quote Link to comment Share on other sites More sharing options...
Saguenay Bill Posted August 31, 2007 Report Share Posted August 31, 2007 I use the SD modular. I'm on my 2nd one of these. I bought the heated shield and use it all the time. If temp is +10F or higher I don't use the mouth piece, but if temp is below +10F, I use the mouth piece. Quote Link to comment Share on other sites More sharing options...
GTSE800 Posted August 31, 2007 Report Share Posted August 31, 2007 I have the Ski-Doo BV2S Helmet since the 04 / 05 season and love it. Some of the pluses IMO are, Very comfotable. Warm. No wind noize. Built in sun visor. (Don't know how I rode without one before) Rear light. (People who rode behind me say it shows up good) Great perefial vision (spelling?) Negitives IMO are. Its a tight fiting helmet, so make sure you get the right size. It takes a little longer to put on then a regular helmet. Make sure you put it on correctly, don't rush it. If you do not seal it up right it will ice up on ya. It took a while to figure it out. They doo have heated shields $$$$ but doo you realy need one? I bought one just to play it safe, and I could not see very good out of it, so I tried to clean the shield and it got worse. The dealer gave me another one and the same thing happen so I tried too use some compounds to clean the lense and it got some minor scractches in it and I got a little pee'ed off and put it back in the box, maybe someday I will try it again??? If you use a commnucator, good luck, I have the chatter box and could not attach it to the helmet, so I bought an extension wire so I could attach the box to my side, that will work, but then you need to put the mic in the mouth piece without having a air leak, so that went back in the box also. :o( if you ever figure out a good method to attach it to helmet let us all know. All in all, I think the +'s out way the neg's. Quote Link to comment Share on other sites More sharing options...
BOBLER Posted August 31, 2007 Report Share Posted August 31, 2007 I've been using a Cat TXi helmet the last few years, but will be trying out a BV2s this winter. I had one of those TXI, too heavy for me, I have tried almost everything out there, including the new scorpions (peice of crap) by the way, all my helmets needed a heated sheild, I tried the mod and Bv2S on at a dealer and couldn't stand them, then last year I was riding with a guy who wanted to try my scorpion, he had a Bv2S, so we swapped, I was sold right away, bought one with an Elec sheild, first trip I tried it without elec sheild, sold the elec next day, best helmet ever, and at one point I swore i would never own one, its nice to not have that cord attached anymore Quote Link to comment Share on other sites More sharing options...
dooright Posted September 1, 2007 Report Share Posted September 1, 2007 Bv2S best helmet i have ever used in cold weather. Quote Link to comment Share on other sites More sharing options...
kgallis Posted September 2, 2007 Report Share Posted September 2, 2007 Skidoo modular helmet. They run small and the breath deflector is a little tight around my mouth, sometimes making it difficult for others to understand me on the communicators. It is the best helmet that I have had so far and will use it this season again. Quote Link to comment Share on other sites More sharing options...
timbo Posted September 3, 2007 Report Share Posted September 3, 2007 I have the Ski-Doo BV2S Helmet since the 04 / 05 season and love it.Some of the pluses IMO are, Very comfotable. Warm. No wind noize. Built in sun visor. (Don't know how I rode without one before) Rear light. (People who rode behind me say it shows up good) Great perefial vision (spelling?) Negitives IMO are. Its a tight fiting helmet, so make sure you get the right size. It takes a little longer to put on then a regular helmet. Make sure you put it on correctly, don't rush it. If you do not seal it up right it will ice up on ya. It took a while to figure it out. They doo have heated shields $$$$ but doo you realy need one? I bought one just to play it safe, and I could not see very good out of it, so I tried to clean the shield and it got worse. The dealer gave me another one and the same thing happen so I tried too use some compounds to clean the lense and it got some minor scractches in it and I got a little pee'ed off and put it back in the box, maybe someday I will try it again??? If you use a commnucator, good luck, I have the chatter box and could not attach it to the helmet, so I bought an extension wire so I could attach the box to my side, that will work, but then you need to put the mic in the mouth piece without having a air leak, so that went back in the box also. :o( if you ever figure out a good method to attach it to helmet let us all know. All in all, I think the +'s out way the neg's. Yo GTSE800 I use a chatterbox and put off using an impusle-bought BV2S for the concern you mention. I had used a polaris modular/hinged helmet the last few years and was experiencing sealing problems with the face shield. Last fall when I had a little time on my hands, i got the BV2S out of the box and played around with it for a few hours. I came up with a "fix" that worked well and held up thru the entire season last winter. 1: remove the rubber face/mouth piece from the helmet. 2: hold it on your face in the position that it will be in when it is in-place over your mouth/nose area when the helmet is on and sealed up 3: on the left, lower side, about 1/2" from the edge of the flutter valve, take you a sharpie and make a dot on the outside of the mouthpiece. 4: take your chatterbox "in-helmet" wiring harness and (this is tuff to do) cut your mike cord about two inches from its harness end. 5: fire up your propane torch and get you a small finishing nail, awl, punch, ice pick, etc, that is about 1/2 the diameter of your mike wire. 6: heat the rascal up till it is nice and cherry. 7: pierce the mouthpiece where you made the dot. just touch it to the rubber. you will have seared a nice round hole into the side of the mouthpiece 8: remove the perforated protective cover sleve from the microphone. the hard plastic microphone assembly is perforated on one side and solid on the other. 9: "try" position the microphone inside the mouthpiece, with the mike on an angle alongside the crease at the bottom of the mouthpiece. you need to ensure that the mike lies along side of, and will not interfere with the flutter valve. obviously, at this time you thread the mike cord from the inside, out of the m mouthpiece. with the mike in the position you have selected, take your sharpie and make two dots on the exterior of the mouthpiece, at either end of the mike to mark where you want to secure it in the mouthpiece. 10: get you a tube of ordinary "household" GOOP. 11: put a drop of goop on the inside of your mask between the two dots you marked on the outside indicating where the mike was to be bedded. 12: put a small drop of goop on the back side of the mike (the non-perforated side) 13: get you a small "C" clamp and, with one end on the inside, on the mike, and one on the outside of the mask between your two dot marks, dog the clamp down and hold the mike in place till the goop cures. 14: splice the mike back into the wiring harness (there are just two wires, but they are tiny, so be careful stripping and soldering them). reinstall the wiring harness in your helmet. 15: the connector that hooks up your in-helmet wiring harness to your chatterbox is the same "end" as is found in the computer industry to connect keyboards to a computer (pre-usb). You can either buy an "extension cord" directly from chatterbox, or go to a computer/electronics store and buy a short one. 16. Where you normally would install your chatterbox on your helmet, you instead, epoxy a plastic "wire hanger" like you would use to hold trailer wiring, on the side of your helmet, at the location where you would install your chatterbox if the BV2S had the proper exterior geometry to install one. You place the plug at the end of your in-helmet wiring assembly in the loop of the wire hanger, then epoxy it fast. (I am not terribly concerned with the exterior appearance of my helmet, being more of a function over appearance dude, so i drilled a very small hole in my helmet and affixed the wire hanger with a small pan head sheet metal screw). 17. You now carry your chatterbox, safe, secure, and warm, inside your front jacket pocket. You run your coiled extension wire from your chatterbox inside your jacket, up to the plug which is attached to the side of your helmet. Presto, you are good to go. 18. With your Chatterbox inside your jacket, expect roughly 20 - 25% longer battery life, as your chatterbox is no longer exposed to normal riding temps you traverse the winter wonderland in La Belle Province. PS: you no longer have the weight of your radio on your helmet. 19. Variations on this theme entail carrying your radio in a tank or windshield bag; to really soup it up, put the radio in a cloth bag, together with a chemical hand warmer. You'll get the longer battery life mentioned above. From time to time, when i'm riding with buddies who give me a hand, i put my radio in my backpack, wrapped in a sock with a handwarmer. Even with the extra two wires i use, (my ptt handlebar button and my dc feed off my sled to keep the radio charged up to max all the time, when i have the radio in a tank or windshield bag there is no sweat. It's all right there in front of me. We've been doing this (radio off the helmet) for the last few years. With the chatterbox X-2"s we have experienced minimal degradation in transmission or reception range with the units off the helmet and in the jacket or windshield bag. last comments on the "mike in the mouthpiece" installation. after you have finished up the installation job, take a soft washcloth with warm soapy water, and gently wash over the inside of the mouthpiece around the installed mike. that goop has a nasty smell when and immediately after curing. if you air it out for a day after it cures, then wash the interior of the mouthpiece with the soapy water and rinse well, after a day or two any aroma will be gone. The goop to goop bond, enhanced by squishing the bond a little with the c-clamp, is very durable. The hole where the mike wire goes thru the cheekpiece of the mouthpiece seals well and is no issue if you make a small enough hole with your burn thru. If you don't want to epoxy a wire hanger on, or drill a hole in your helmet to secure the end of the in-helmet wiring harness; just use gorilla tape and tape it to the outside of your helmet. it works just as well You may have to trim your in mouthpiece diaper to ensure that it doesn't cover the mike perforations and interfere with your transmission volume. timbo Quote Link to comment Share on other sites More sharing options...
scorpionbowl Posted September 3, 2007 Report Share Posted September 3, 2007 I also have an HJC CL-14, didn't know it was noisy. It helps to add some weather stripping on the top of the shield where it meets the helmet. The best features are that the helmet and shields are [relatively] inexpensive, most people i ride with have them, so we carry a spare parts/shields, and every dealer has them if you need parts on the trail. The only disadvantage is it doesn't have the sun-visor. I've seen many who ride with a BV2s, although maybe earlier designs, they had major flaws. Maybe they're ok for riding in the US, but not for hardcore sledders [can we use that term here?]. If the weather is below zero, the breath guard will freeze up, and cause fogging. Thats why they created a heated shield. I've only riden with one other person that had the bv2s and heated shield, and the shield was defective and still fogged, he returned both and now has an hjc. Knowing skidoo, if the e-shield dies in the middle of a 7 day trip, the dealer won't have the replacement in stock. Quote Link to comment Share on other sites More sharing options...
artcat900 Posted September 3, 2007 Report Share Posted September 3, 2007 I have the Ski-Doo BV2S Helmet since the 04 / 05 season and love it.Some of the pluses IMO are, Very comfotable. Warm. No wind noize. Built in sun visor. (Don't know how I rode without one before) Rear light. (People who rode behind me say it shows up good) Great perefial vision (spelling?) Negitives IMO are. Its a tight fiting helmet, so make sure you get the right size. It takes a little longer to put on then a regular helmet. Make sure you put it on correctly, don't rush it. If you do not seal it up right it will ice up on ya. It took a while to figure it out. They doo have heated shields $$$$ but doo you realy need one? I bought one just to play it safe, and I could not see very good out of it, so I tried to clean the shield and it got worse. The dealer gave me another one and the same thing happen so I tried too use some compounds to clean the lense and it got some minor scractches in it and I got a little pee'ed off and put it back in the box, maybe someday I will try it again??? If you use a commnucator, good luck, I have the chatter box and could not attach it to the helmet, so I bought an extension wire so I could attach the box to my side, that will work, but then you need to put the mic in the mouth piece without having a air leak, so that went back in the box also. :o( if you ever figure out a good method to attach it to helmet let us all know. All in all, I think the +'s out way the neg's. One product I have found that really seems to work well for cleaning face shields is called CAT CRAP http://www.ems.com/catalog/product_detail_...t+crap+anti+fog One thing I have noticed in using this is that the first time that you apply it, there seems to be a film on the inside of the shield that may be applied during manufacturing. That film seems to catch all kinds of dirt and degrades the optical clarity of the shield in short order. When you use the cat crap for cleaning the first time it seems to get absorbed into that film and dries fast making it hard to get off. It takes a lot of rubbing to get that dried up film off the first time with a very soft tissue. However after the first treatment any further cleanings are a breeze, leaving the treated surface silky smooth. The difference in optical clarity afterwards is like night and day and fogging seems to be reduced a lot if you continue using the product. Hope that helps Quote Link to comment Share on other sites More sharing options...
GTSE800 Posted September 4, 2007 Report Share Posted September 4, 2007 Yo GTSE800I use a chatterbox and put off using an impusle-bought BV2S for the concern you mention. I had used a polaris modular/hinged helmet the last few years and was experiencing sealing problems with the face shield. Last fall when I had a little time on my hands, i got the BV2S out of the box and played around with it for a few hours. I came up with a "fix" that worked well and held up thru the entire season last winter. 1: remove the rubber face/mouth piece from the helmet. 2: hold it on your face in the position that it will be in when it is in-place over your mouth/nose area when the helmet is on and sealed up 3: on the left, lower side, about 1/2" from the edge of the flutter valve, take you a sharpie and make a dot on the outside of the mouthpiece. 4: take your chatterbox "in-helmet" wiring harness and (this is tuff to do) cut your mike cord about two inches from its harness end. 5: fire up your propane torch and get you a small finishing nail, awl, punch, ice pick, etc, that is about 1/2 the diameter of your mike wire. 6: heat the rascal up till it is nice and cherry. 7: pierce the mouthpiece where you made the dot. just touch it to the rubber. you will have seared a nice round hole into the side of the mouthpiece 8: remove the perforated protective cover sleve from the microphone. the hard plastic microphone assembly is perforated on one side and solid on the other. 9: "try" position the microphone inside the mouthpiece, with the mike on an angle alongside the crease at the bottom of the mouthpiece. you need to ensure that the mike lies along side of, and will not interfere with the flutter valve. obviously, at this time you thread the mike cord from the inside, out of the m mouthpiece. with the mike in the position you have selected, take your sharpie and make two dots on the exterior of the mouthpiece, at either end of the mike to mark where you want to secure it in the mouthpiece. 10: get you a tube of ordinary "household" GOOP. 11: put a drop of goop on the inside of your mask between the two dots you marked on the outside indicating where the mike was to be bedded. 12: put a small drop of goop on the back side of the mike (the non-perforated side) 13: get you a small "C" clamp and, with one end on the inside, on the mike, and one on the outside of the mask between your two dot marks, dog the clamp down and hold the mike in place till the goop cures. 14: splice the mike back into the wiring harness (there are just two wires, but they are tiny, so be careful stripping and soldering them). reinstall the wiring harness in your helmet. 15: the connector that hooks up your in-helmet wiring harness to your chatterbox is the same "end" as is found in the computer industry to connect keyboards to a computer (pre-usb). You can either buy an "extension cord" directly from chatterbox, or go to a computer/electronics store and buy a short one. 16. Where you normally would install your chatterbox on your helmet, you instead, epoxy a plastic "wire hanger" like you would use to hold trailer wiring, on the side of your helmet, at the location where you would install your chatterbox if the BV2S had the proper exterior geometry to install one. You place the plug at the end of your in-helmet wiring assembly in the loop of the wire hanger, then epoxy it fast. (I am not terribly concerned with the exterior appearance of my helmet, being more of a function over appearance dude, so i drilled a very small hole in my helmet and affixed the wire hanger with a small pan head sheet metal screw). 17. You now carry your chatterbox, safe, secure, and warm, inside your front jacket pocket. You run your coiled extension wire from your chatterbox inside your jacket, up to the plug which is attached to the side of your helmet. Presto, you are good to go. 18. With your Chatterbox inside your jacket, expect roughly 20 - 25% longer battery life, as your chatterbox is no longer exposed to normal riding temps you traverse the winter wonderland in La Belle Province. PS: you no longer have the weight of your radio on your helmet. 19. Variations on this theme entail carrying your radio in a tank or windshield bag; to really soup it up, put the radio in a cloth bag, together with a chemical hand warmer. You'll get the longer battery life mentioned above. From time to time, when i'm riding with buddies who give me a hand, i put my radio in my backpack, wrapped in a sock with a handwarmer. Even with the extra two wires i use, (my ptt handlebar button and my dc feed off my sled to keep the radio charged up to max all the time, when i have the radio in a tank or windshield bag there is no sweat. It's all right there in front of me. We've been doing this (radio off the helmet) for the last few years. With the chatterbox X-2"s we have experienced minimal degradation in transmission or reception range with the units off the helmet and in the jacket or windshield bag. last comments on the "mike in the mouthpiece" installation. after you have finished up the installation job, take a soft washcloth with warm soapy water, and gently wash over the inside of the mouthpiece around the installed mike. that goop has a nasty smell when and immediately after curing. if you air it out for a day after it cures, then wash the interior of the mouthpiece with the soapy water and rinse well, after a day or two any aroma will be gone. The goop to goop bond, enhanced by squishing the bond a little with the c-clamp, is very durable. The hole where the mike wire goes thru the cheekpiece of the mouthpiece seals well and is no issue if you make a small enough hole with your burn thru. If you don't want to epoxy a wire hanger on, or drill a hole in your helmet to secure the end of the in-helmet wiring harness; just use gorilla tape and tape it to the outside of your helmet. it works just as well You may have to trim your in mouthpiece diaper to ensure that it doesn't cover the mike perforations and interfere with your transmission volume. timbo This is a great reply Timbo. a lot of good infomation here. I will give it a try and see if I can get the same results as you did. Just an added note, I would not give up the BV2S just so I could use the Chatter box, but I will give this a try! I have two mouth pieces, so if I screw one up and it don't work out for me. I have a spare. :D I will share the results after I work on it. By the way, only a couple of hours? it must have took you that long to write the instructions! lol I appreacihate that. Thanks again Timbo Quote Link to comment Share on other sites More sharing options...
GTSE800 Posted September 4, 2007 Report Share Posted September 4, 2007 One product I have found that really seems to work well for cleaning face shields is called CAT CRAP http://www.ems.com/catalog/product_detail_...t+crap+anti+fogOne thing I have noticed in using this is that the first time that you apply it, there seems to be a film on the inside of the shield that may be applied during manufacturing. That film seems to catch all kinds of dirt and degrades the optical clarity of the shield in short order. When you use the cat crap for cleaning the first time it seems to get absorbed into that film and dries fast making it hard to get off. It takes a lot of rubbing to get that dried up film off the first time with a very soft tissue. However after the first treatment any further cleanings are a breeze, leaving the treated surface silky smooth. The difference in optical clarity afterwards is like night and day and fogging seems to be reduced a lot if you continue using the product. Hope that helps Wow, another great response. That's exactly what happened, a heavy glue like film after I tried to clean it. I will try that Crap you suggested. I wish I knew this before.... :wacko: I hope its not too messed up after what I have tried to use. Thanks artcat900 Quote Link to comment Share on other sites More sharing options...
GTSE800 Posted September 22, 2007 Report Share Posted September 22, 2007 One product I have found that really seems to work well for cleaning face shields is called CAT CRAP http://www.ems.com/catalog/product_detail_...t+crap+anti+fogOne thing I have noticed in using this is that the first time that you apply it, there seems to be a film on the inside of the shield that may be applied during manufacturing. That film seems to catch all kinds of dirt and degrades the optical clarity of the shield in short order. When you use the cat crap for cleaning the first time it seems to get absorbed into that film and dries fast making it hard to get off. It takes a lot of rubbing to get that dried up film off the first time with a very soft tissue. However after the first treatment any further cleanings are a breeze, leaving the treated surface silky smooth. The difference in optical clarity afterwards is like night and day and fogging seems to be reduced a lot if you continue using the product. Hope that helps I tried the Cat Crap, it helped somewhat, but I think the shield was to far gone. I ended up peeling the heated part of the shield off , I wiped the inner side of it, and it got a lot better, but still has clarity issues. The outer part of the shield is like looking through a peice of glass, so the issue is, the inner heated part of it. Went to a Doo dealer last week to check them out, they let me open up a heated and a non heated shield and I went outside to look through them. It was like night and day, there is no dought that they have issues with the N.O.S. so I will wait until a later version comes in (If and when) I will check them out then. As for the Cat Crap, I used it on my plain shield and it works well, and that stuff should last a while. Thanks again for the suggestion. Quote Link to comment Share on other sites More sharing options...
Mazda Posted September 24, 2007 Report Share Posted September 24, 2007 I use a GMAX motorcross helmet with Bolle Goggles for the daytime and Scott clear goggles for night time. Both have quick straps. I have used full face helemts in the past all of which being HJC with either double or electric shields. I would have to say that I would never go back to a full face helmet ever again. My motocross helmet is so much lighter and more comfortable. I am never cold with it and last year we ran a few 60-80 mile rides at night at -25 celcius. That was my true test for my setup. Great site by the way. Quote Link to comment Share on other sites More sharing options...
too slow Posted September 24, 2007 Report Share Posted September 24, 2007 I use an HJC CL14. It's comfortable and reasonably light but the wind noise is awful. anyone have a helmet they really love?I also prefer to use a heated shield instead of a mouthpiece like the BVS helmets.... Same here. Quote Link to comment Share on other sites More sharing options...
Phil 1 Posted September 24, 2007 Report Share Posted September 24, 2007 Currently a DOO modular. I had tried the BVS and retuned it. I did not care for how difficult it was to get on & off. Also had shield fogging problems with the BVS. The modular is the best sled helmet I have ever used. Quote Link to comment Share on other sites More sharing options...
NHTOM Posted September 24, 2007 Report Share Posted September 24, 2007 I use an El-cheepo HJC, not sure which one, with a heated shield. It cost $150 total. Originally plugged it into the dash mount plug on my Polaris XC. It was OK for days of 10F and above, but on cold mornings it was fogging a bit. Then I found the hot and ground for the headlites and what a difference. I can pant like a Saint Bernard at -20F and not a bit of fog. Another plus- when its super cold and you want no air getting in the helmet, I tape all the vents over. And with this headlite hook up I still get zero fogging. The only drawback is you have to have someone in your party give you an uppercut to get your helmet off at the 1st Relay stop!! Quote Link to comment Share on other sites More sharing options...
kdelabruere Posted September 25, 2007 Report Share Posted September 25, 2007 I wear an Arctic Cat black and chrome TXI with a heated shield. A very nice helmet in my opinion. It is warm and I have never had fogging or frost issues. X2 Quote Link to comment Share on other sites More sharing options...
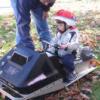
Doo time Posted September 25, 2007 Report Share Posted September 25, 2007 I used my "el-cheapo" $100 helemet for 6 years, thought a helmet was a helmet. Then last year I got the urge to splurge, and bought the modular for $250. WOW, wish I would have done that years ago, the sun visor, no fogging. Sure a little trickier to get in and out of, but you can flip the whole thing, so you don't have to take the helmet off to talk or have a trailside smoke. Hey how much longer before I can head up to HEAVEN...I mean Mont Vallin...? I can't wait much longer. Thinking of taking the carbides off on a cool morning while the dew is on the ground just to get the feeling back. the picture shows the deceased el cheapo on the bars PS cut the whole where the electric gas gauge would go if you do not have one installed already, and just leave it open as a vent, I kept my gloves taosty while we not riding all year like that Quote Link to comment Share on other sites More sharing options...
Guest racersin Posted September 26, 2007 Report Share Posted September 26, 2007 Good ol Modular for me. With heated shield of course. I won't ride Quebec without a heated shield. Rode with people that did'nt have Heated shield on cold days and they get "scrapeitis". every time you stop they start scraping at thier shields. What a pain in the a$$. One guy rode with his shield cracked open & got frostbite. Bill may remerber that. Deano Quote Link to comment Share on other sites More sharing options...
Saguenay Bill Posted September 26, 2007 Report Share Posted September 26, 2007 Good ol Modular for me. With heated shield of course. I won't ride Quebec without a heated shield. Rode with people that did'nt have Heated shield on cold days and they get "scrapeitis". every time you stop they start scraping at thier shields. What a pain in the a$$. One guy rode with his shield cracked open & got frostbite. Bill may remerber that. Deano You bet I remember that deal. That went on for several years and then I think you told him "heated shield or you don't come" or else we ragged on him so much that it finally sunk in. I like that new word "scrapeitis". Bill Quote Link to comment Share on other sites More sharing options...
GTSE800 Posted September 27, 2007 Report Share Posted September 27, 2007 Good ol Modular for me. With heated shield of course. I won't ride Quebec without a heated shield. Rode with people that did'nt have Heated shield on cold days and they get "scrapeitis". every time you stop they start scraping at thier shields. What a pain in the a$$. One guy rode with his shield cracked open & got frostbite. Bill may remerber that. Deano It's nice to have a fan cooled sled in the group when the shields are fogging, also to warm your hands if needed! Quote Link to comment Share on other sites More sharing options...
Phil 1 Posted September 27, 2007 Report Share Posted September 27, 2007 What is a fan cooled sled? Quote Link to comment Share on other sites More sharing options...
GTSE800 Posted September 27, 2007 Report Share Posted September 27, 2007 What is a fan cooled sled? It's a fan that runs continues while the motor is running. and it blows the air out the side vent, like a heater. Versus, a liquid cooled sled where you need snow kicking up on the heat exchangers. Quote Link to comment Share on other sites More sharing options...
Recommended Posts
Join the conversation
You can post now and register later. If you have an account, sign in now to post with your account.